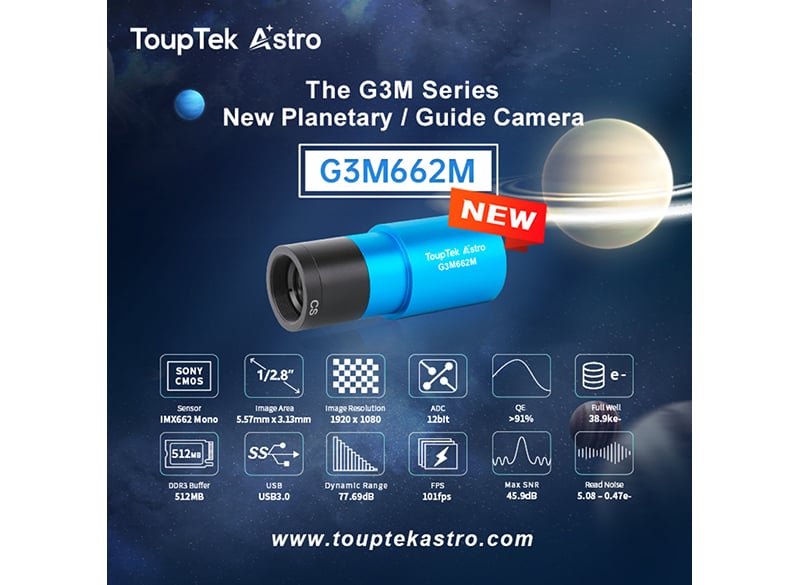
PHD2 Guiding is a widely used guiding software in astrophotography. ToupTek Astro planetary and guiding cameras integrate with PHD2 Guiding to support a smoother guiding process, helping beginners set up guiding for deep-sky photography.
Use this tutorial to set up PHD2 Guiding with ToupTek Astro planetary and guiding cameras.
Installing PHD2 Software
Download PHD2 from the official PHD2 website: PHD2 downloads.
Installing and Updating PHD2 Drivers
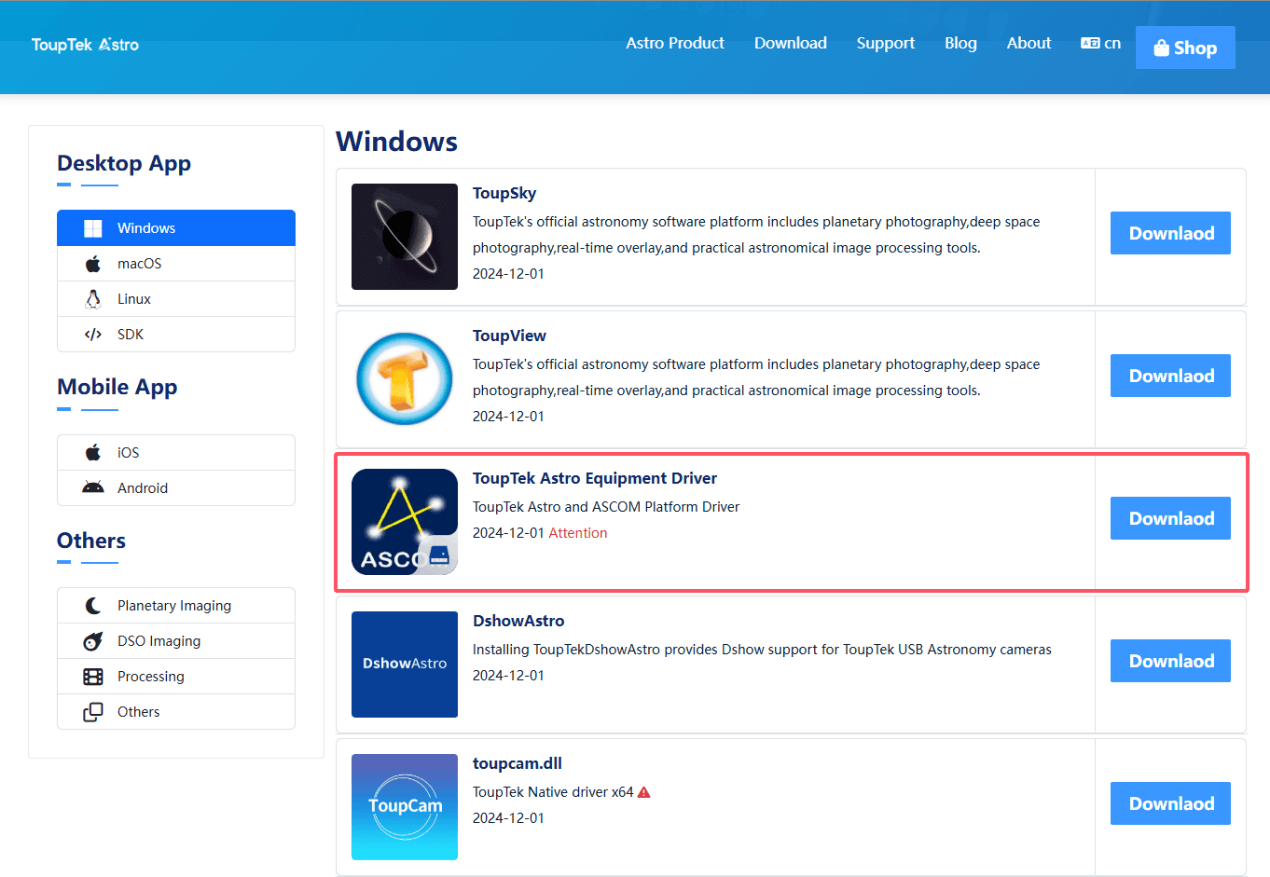
If you have an earlier version of PHD2 installed, update to the latest version. If you need to update or install the ToupTek native driver without upgrading PHD2, follow these steps:
- The ToupTekASCOMSetup.exe package (versions after 20240402) includes the native driver for ToupTek cameras. Running this installation will automatically detect and update the native drivers for software such as N.I.N.A., PHD2, SharpCap, FireCapture, and APT.
- Download the latest ToupTek ASCOM driver package from the ToupTek Astro download center.
PHD2 Guiding Setup
1. Hardware Connection
- Use the included USB cable to connect the guiding camera to your computer.
- Use the ST4 cable to connect the camera to the mount. Skip this step if using ASCOM guiding; instead, use an EQMOD cable or similar cable to connect the mount to your computer. Power on the mount.
2. Launching PHD2
- Open the PHD2 software.
- If using N.I.N.A., select PHD2 under Devices > Guiding, specify the PHD2 installation path, and click Launch.
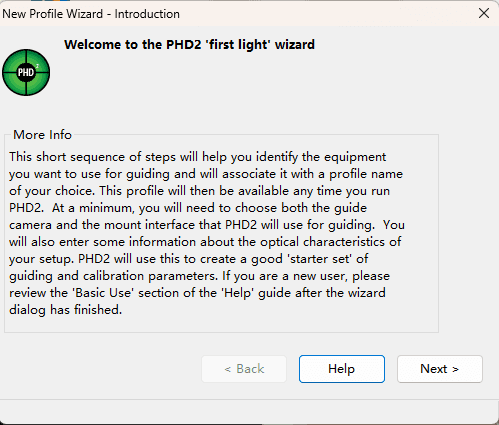
- During the first launch, the PHD2 Setup Wizard will appear. Click Next to proceed.
3. Camera Selection
- From the dropdown menu under Guide Camera, select ToupTek Camera. If the camera is connected, PHD2 will auto-detect some parameters.
- Enter the focal length of the guide scope. OAG users should use the primary telescope focal length. Click Next.
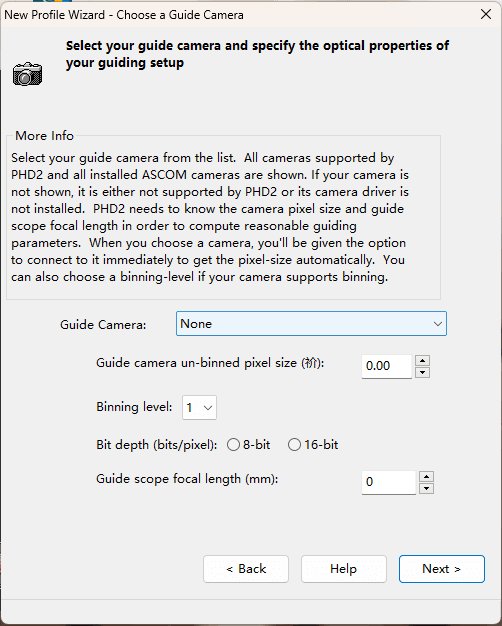
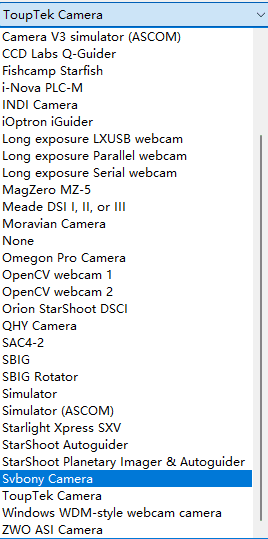
Note: For cameras with smaller pixels, such as G3M715C, set the Binning Level to 2.
4. Mount Selection
- If using ST4 guiding, select On-camera under Mount.
- For ASCOM guiding, choose the ASCOM driver for your mount. Click Next.
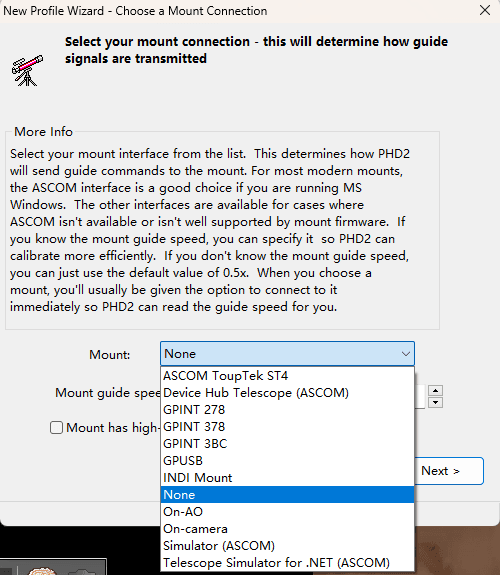
5. Additional Setup
- Complete the remaining device selection and connections as required.
- In the final setup screen, name the configuration profile and decide whether to create a dark library. For most fast optical systems, you may skip creating the dark library initially and set it up later as needed. Click Finish to exit the wizard.
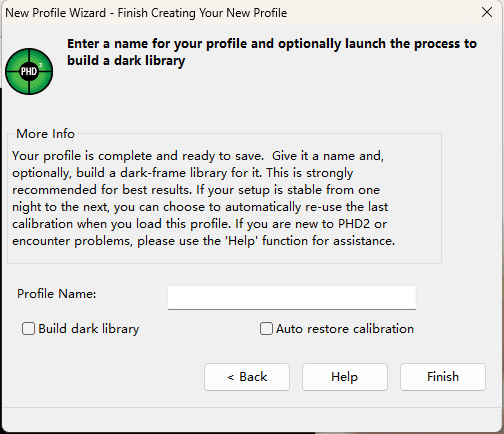
6. Connecting Devices
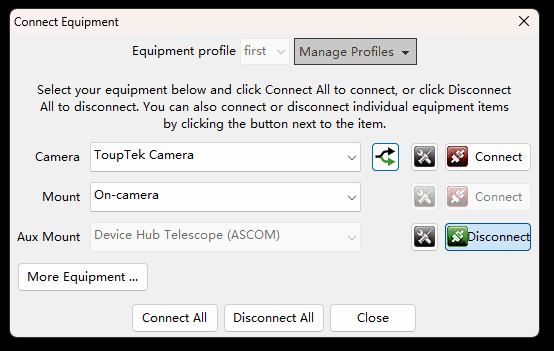
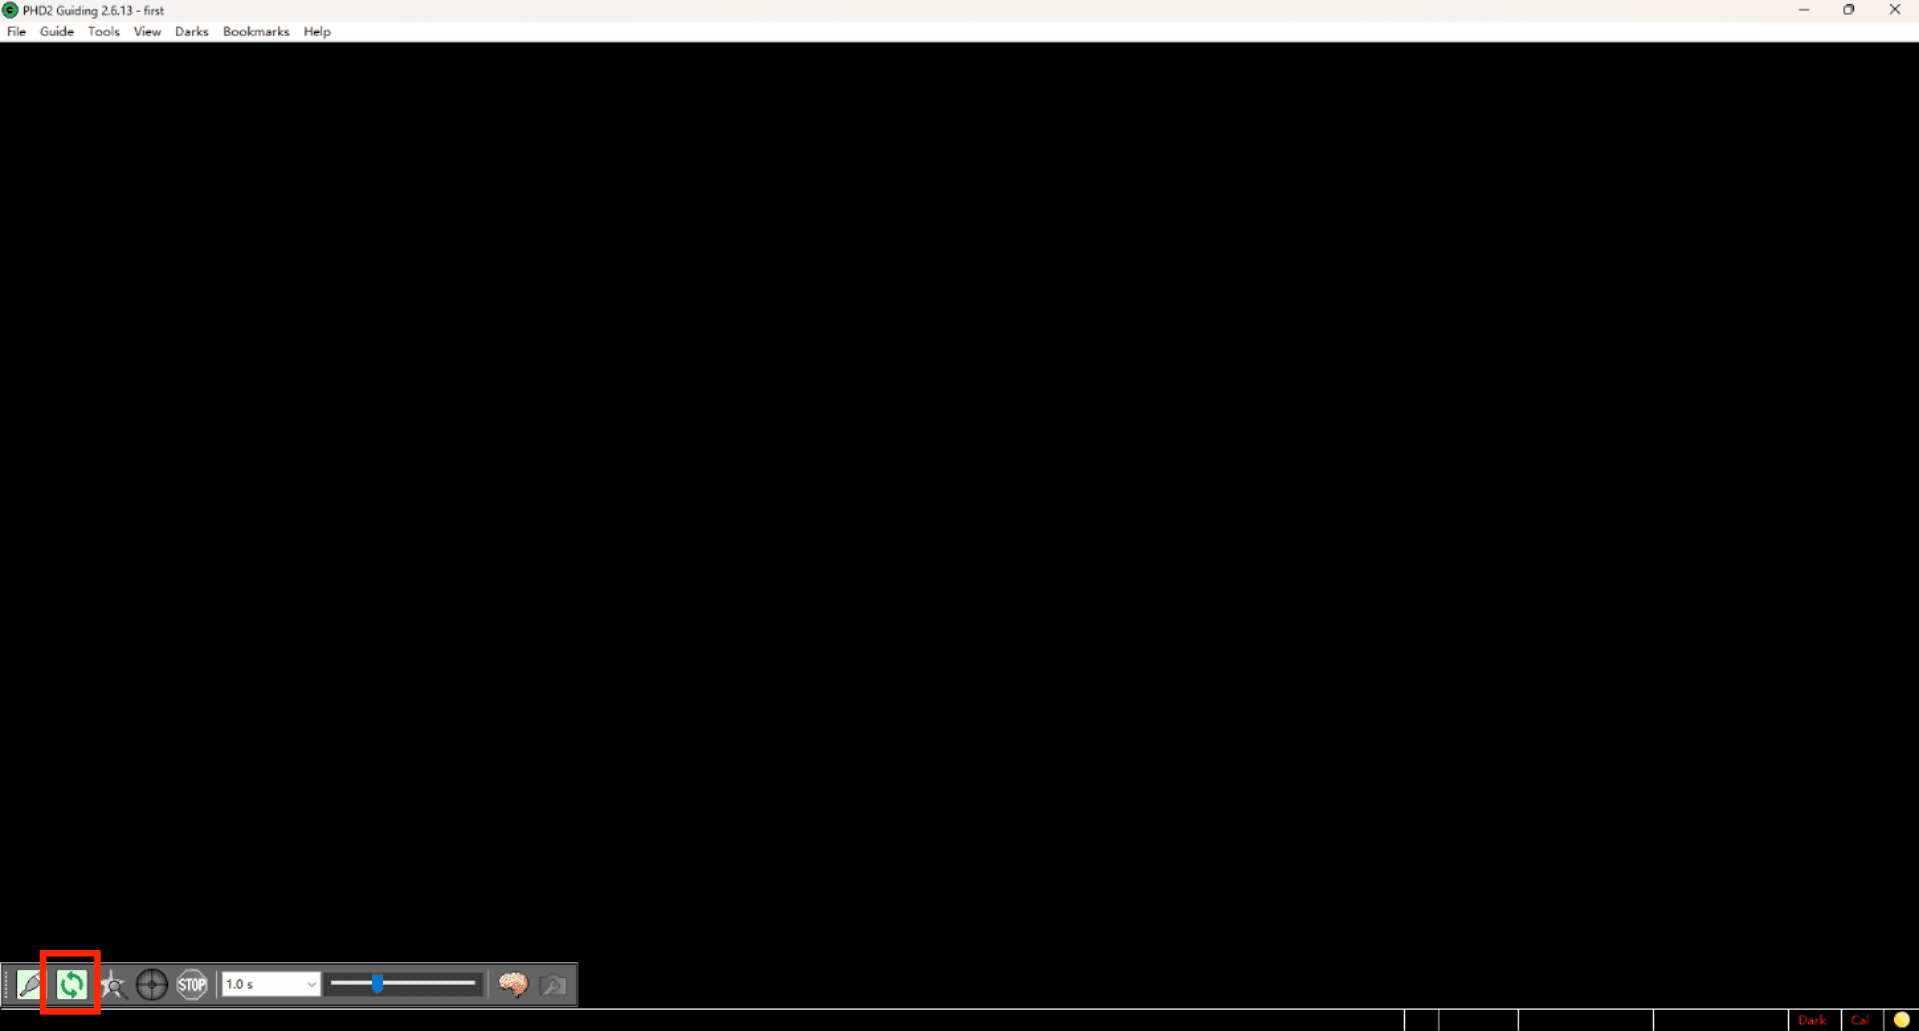
- Click the first icon in the bottom control panel to open the Device Connection window. Select the correct ToupTek Astro guiding camera model and click Connect.
- Then, under Mount, click Connect as well. Close the window.
7. Starting Exposure
- Click the second icon in the bottom control panel to begin exposure.
8. Focusing the Guiding Scope
- Perform a rough focus on a distant terrestrial object during the day and fine-tune at night.
- If the image appears overexposed or unclear, check the focus and adjust exposure time and software display settings. Once a guide star is selected, click Start Guiding to begin calibration and guiding.
Quick Troubleshooting for PHD2
1. Camera Not Exposing or PHD2 Error Messages
- Cause: The guiding camera is already connected to another software, such as N.I.N.A., or the wrong camera is selected in the PHD2 device menu.
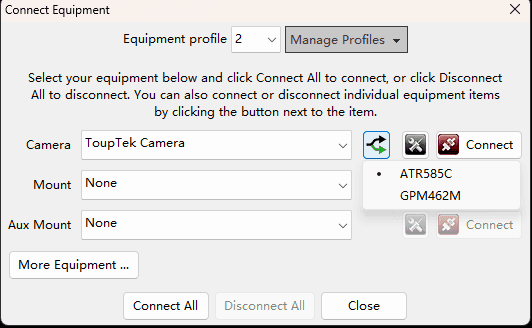
- Solution: Disconnect other software from the guiding camera and reconnect it in PHD2. Open the Device Connection window, use the multi-device selection button, and choose the correct guiding camera.
2. Overexposed or Blank Images During Exposure
- Cause: The guiding system is out of focus, causing PHD2 auto-stretch to fail.
- Solution: Focus on a distant object during the day and mark the focus position. At night, adjust to the marked position and fine-tune using a bright star or terrestrial light. Use software such as ToupSky or SharpCap with longer exposure times and higher gain to assist focusing. Return to PHD2 for further adjustments.
3. Calibration Failures in PHD2 Guiding
- Cause: Mismatch between the guide speed in ONSTEP controllers and PHD2 default settings.
- Solution: Access ONSTEP via the mobile app or web interface. A recommended method is to connect to ONSTEP WiFi and visit 192.168.0.1. Set the guide speed to 0.5x, or consult the mount manufacturer.
- In PHD2, navigate to Advanced Settings > Guiding > Calibration > Advanced..., and ensure the guide speed matches the ONSTEP setting. Verify focal length, pixel size, and binning settings. Clear calibration data and restart the calibration process.
Tips for Fine-Tuning Guiding with OAG Off-Axis Guiders
If you are using ToupTek OAG-L or OAG-X as your guiding tool, use the following tips to improve adjustment efficiency.
- Timing for Adjustments: Perform initial OAG adjustments during the daytime. Confirm that both the main imaging camera and the guiding camera achieve focus simultaneously. Once aligned, proceed with nighttime testing.
- Finding the OAG Focus Position: ToupTek OAG-L is optimized for quickly determining the focus position. Adjust the prism height so that the top edge of the prism is near the edge of the OAG M48 adapter ring.
- Insert GPCMOS/G3M/GPM series cameras fully into the guider port. Then, fine-tune by slightly pulling the camera out or adjusting the guider focus mechanism outward.
- For other specifications such as M54 or M68, adjust the prism and camera insertion depth relative to the M48 setup to find the focus.
- Ensuring Proper Focus: Always ensure the main imaging camera is focused on the target before adjusting the OAG focus. If the main camera is out of focus, even if the OAG achieves focus, the optical system will remain out of alignment.